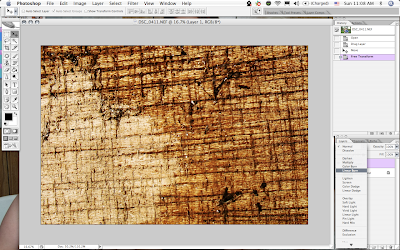
One way you can accomplish this:
0.) Edit the picture how you want it. You can do this at the end of the whole process, but I like to do it before.
1.) Search on Google for free photoshop textures. pick a few, download them, save them to your computer.
2.) Open your photo in photoshop
3.) Open your chosen texture file in photoshop. Be mindful of the colors in your photo and that of your texture, because they'll mesh and get ugly.
4.) Drag your texture on top of your photo. It may show up really small, so you'll have to enlarge it for it to cover the whole photograph.
6.) But now you can't see your photo beneath the texture. So go to your layers menu, click on the drop down menu (should by default say Normal) and you can choose from either Overlay or Soft light. Overlay is a little harsh for me, so I went with the latter.
7.) Now it should look like this.
8.) I didin't want the texture to be so obvious, so I went back to my layers menu and altered the opacity. Slide it around till you get a look you like.
9.) I did somewhere around 35%. This is what it looks like:
10.) You then need to create a layer mask. In your layer menu, at the very bottom, click on the square with a circle in it. Your Layer 1 will then look like this:
11.) Making sure the white box is selected in your Layer 1 (see above photo), choose your black paintbrush
12.) Next, paint over the parts of the picture that you don't want to be textured. The black paintbrush will essentially erase that layer. I painted over the baby and left everything as is. Here's starting over his face.
13.) Finished photo. Your Layer Mask box in Layer 1 should look like as seen below (should have the outline of what you colored over)
And now you're done!!
You can add multiple layers of textures, which is what I did in my final photo (seen at top) and just mess around.
Later!


No comments:
Post a Comment