Posting this photo now. Info later!
Monday, November 1, 2010

Tuesday, October 19, 2010
Day 22- ZOMBIES
Sometimes I just get in the mood to create something! This time I was feeling a shoot with more than 2 people and something different other than the person in street clothes posing for me on paper backdrops. I asked my friend Jessica if she would be interested and then we shot around ideas to make the shoot more interesting. Shooting water? Been there. Throwing paint? Too messy. Light writing? Possibility. Bubbles? Kinda lame. Food fight? Waste.
In light of it almost being Halloween (whoop!) we decided on a Zombie Shoot.
Sunday 6 people (1 of which I knew) (4 girls, 2 boys) came over and we started shooting outside in my backyard.
I had out two strobes, one shooting thru a diffuser/umbrella, and the other with a softbox on it. I put the lights on either side of the group, didn't really mess with them, just hoped for the best.
For most of the shoot I used my 50mm portrait lens and shot at 100ISO and 1/60 at f5.
All the photos were edited Adobe Lightroom 2. I messed around a lot and when I finally found a combination of settings that I liked, I pasted those onto all the photos that I was going to use.
Going back there would be a couple things I would change, a few ideas I'd use, but with each shoot I learn more.
Anyways, this was a super fun shoot and I'm glad for the people that went out and got supplies and clothing and made this awesome!!
Some problems I had:
- People moving around, casting shadows on others behind them
- Strobes cycling too slow, flashes didn't always go off.
- SYNC CORD! Ah, the bane of my existence. Trying to move around while my camera is connected to one of the lights. Both lights tipped over at separate times and one umbrella broke.
- White balance. For once I did not have a single problem with it. So it shouldn't be on this list. But I just wanted to point it out!!
- Camera focusing. We were out in the dark and at times I couldn't tell if my camera was correctly focused on the subjects or not.


Thursday, October 7, 2010
Day 21
Yesterday I got home and Garrett was taking a nap and I was feeling restless. So, I decided to make a skyline of Flint. It was originally for something I can't remember, but as I worked--the idea progressed quickly into what you'll see below.
First, I needed some photos of Flint. Since it's not a huge city and has claim to maybe 3 'skyscrapers' there weren't many photos as I looked on Google. I started grabbing various ones, deciding that I would piece them together to make my own skyline.


This last photo was chosen to be the basis to the final project, the photo that all the others would be placed into. See below.

Next I selected, using the Magic Wand tool, all the white space in the above photo in Photoshop, then inversed it so that all the building would be selected instead (quicker). I then clicked Edit in Quick Mask Mode (underneath the background/foreground color chooser thing). Everything that was not selected is now shown in red, and I used the Brush tool to paint in some of the windows and lines of certain buildings that I wanted to stand out. Took a few tries before I got it how I wanted it. Went back to standard mode, and with the selection still...selected, I went Edit>Fill and filled in the buildings with black paint.

I edited some here and there, adding textures or going under Filter and looking at all the choices for Artistic, Blur, Distort, etc. Kept trying till I got something I could be happy with.
I then pulled up the biggest Salvation Army shield from Google that I could find. Opening it Photoshop, I filled it in using the black paintbucket. I cropped off the uppermost shield and with very little effort, dragged in the skyline and placed it on top of the shield.
In a separate page I typed out Flint, one letter at a time/separate layers, and then since I could not for the life of me remember how to do what I wanted to correctly, settled for nudging the letters in the Liquify option, to make them more curvy. Threw them on the shield and it took me about five tries of saving the photo, uploading it to facebook, deciding I didn't like it and redoing it over and over.
The scripture was easy. My brother has part of Isaiah 61 tattooed on his arm. I couldn't remember what Bible verse it was tho, so I almost ended up putting in part of a speech by William Booth. I actually got that typed into the shield and everything before I remembered the other verses location.
So it took me maybe 4 hours to make this. I don't think it's the greatest thing ever because of how fast and sloppy I did it, but when the mood strikes me I'm gone.
Here's the final:

Tuesday, August 24, 2010
Day 20
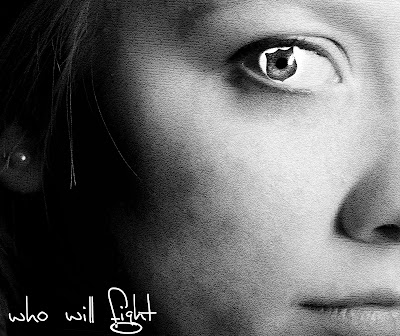
I did this on a whim last night, it took me two hours and I used an old photo.
I edited the original in Photoshop.
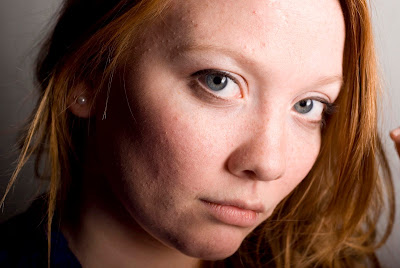
This is what it looked like!
I copied the eye and opened it in a new window, then proceeded to grab a photo of a Salvation Army shield and opened that in a separate window:

I erased everything inside the shield except for its outline. I put that over the eye and resized it until it looked okay. Using the clone tool I filled in any areas that didn't have 'eye' in them.
I edited the eye a little bit too, using burn and dodge to make the eye pop a little better.
I then edited the eye with Lens Distortion and gave it vertical distortion so that it was more angled. I dragged the eye layer into the photo above of the subject (Kim) and resized and turned it until it was where I wanted it. Then I ran Portraiture on the photo to soften the skin. I ran a B/W action and then messed with the photos cropping. I also added some texture to the photo, especially on the skin because I thought it needed something extra so that it wasn't very 'portraity' (although going back I would focus more on clearing the skin up and taking away any blemishes/shadows/lines)
This is what I got:

Sunday, August 1, 2010
Day 19 -- Engagement Photos
Alright. I've only done engagement photos twice. This was my second, and they were strictly outdoors; my first couple we did studio shots. We headed out for the shoot in a nearby park right before a friends open house this summer. Other than my camera, I carried my SB-600 flash on a tripod which provided fill light on the subjects (sometimes for not enough light, sometimes for uneven light that was coming in thru branches or something).
Here's what I got (some other photos were too big of files to upload)


Wednesday, July 28, 2010
Variations


Friday, July 9, 2010
Hawk + Son
**UPDATED JULY 27th, 2010
So I have some pretty cool friends who are in a pretty cool band (and have helped me out by doing the fLint photos).
Here are some quickly edited photos from the shoot I just did for them tonight!
These are all shot outdoors from sunset on. I used my Nikon D80 and my 50mm portrait lens the entire time. Shutter speed was mainly at 200 and aperture was f/9. ISO 125.
2 strobes on full power, one at camera right shooting them from behind into an umbrella. The other was camera left and with a softbox.
**You can click on the photos to see them bigger**


Subscribe to:
Posts (Atom)