Wednesday, July 28, 2010

Variations

Variations of a photo just by messing around (semi-lazily) in Lightroom. The first one is the original.


Friday, July 9, 2010

Hawk + Son


**UPDATED JULY 27th, 2010


So I have some pretty cool friends who are in a pretty cool band (and have helped me out by doing the fLint photos).

Here are some quickly edited photos from the shoot I just did for them tonight!

These are all shot outdoors from sunset on. I used my Nikon D80 and my 50mm portrait lens the entire time. Shutter speed was mainly at 200 and aperture was f/9. ISO 125.
2 strobes on full power, one at camera right shooting them from behind into an umbrella. The other was camera left and with a softbox.

**You can click on the photos to see them bigger**


Tuesday, June 22, 2010

Day 18 -- PUBLICATION


Things are going pretty good for me right now. I have a permanent job that's some months part-time, some full-time and I like it. Everyone gets along with everyone and we love to eat and hang out so I got pretty lucky there.
I feel a little stuck with a photography name. And I don't feel like I can really move ahead like I want to without one. I have 4 rules when it comes to finding a name, but I won't go into that now. I have however been paying attention to things around me, things I read/sing, trying to find the one that clicks. It may be an insecurity thing or just a wish to be semi-anonymous, but I rather not have my name be my business! Okay, I just gave a rule away, I won't say more---
But things have been going good---I'm saving to get a new camera, I have a few shoots coming up within the next few weeks that I'm excited about. I raised my prices too, as you may have read in my last entry. It may annoy some people that I did, but this is what I went to school for--for 4 years, this is my career and future business. Outside of school expenses I've laid down at least $5,000 if not more on lighting, backgrounds, camera equipment, and props. Earning $40 a shoot is not going to put a dent in anything! Especially when one shoot takes me about 11 hours of editing and around hour 4 I wonder where's the incentive?

SOOOOO---to the really exciting part of this entry----Sometime in late April/early May I got an email from a guy saying he wanted to use one of my photos for the cover of this magazine. Well, that was super cool!! I had done a photo shoot--mostly for fun, of people making the L sign with their fingers, and then I added F-I-N-T in photoshop so that they spelled FLINT. I got this idea from the tv show Glee! They did it in some of their promotional photos, so I got two groups of friends to come at different times and I took their photos! (Follow photos on left side of page to my Flickr site to see more) Anyway, when I uploaded these photos, I tagged/added them to some of the groups I had joined on Flickr, one of which was the Broadside magazine. They saw the photo, discussed it, then emailed me for permission to use it on their next cover! It came out today and I went with my friend Mitch and picked up two bundles of the issue : )
Here's some photos!!


the original photo:

Okay, that's it for now!! Hope some of this made sense, I'm pretty much half asleep right now anyways!

((P.S.---Broadside is a local alternative magazine that's mostly circulated thru the colleges and small businesses around downtown Flint!))

Thursday, June 17, 2010

NEWS! NEWS!!

So some pretty cool things lately!
1.) As seen in the entry 2 before this, I got new props! They're super cool and I lovvve them!
2.) Still no business name, but I raised my prices! You probably don't want to hear that, but a lot of people kept telling me to and I figured it was time. I didn't want to charge a lot until I was more comfortable with my lighting and my camera and gained a bit more self confidence!
3.) Gonna purchase some new things...
a.) I'm looking to get a new camera (the Nikon D700). This camera will do wonders! It captures a better range of colors and tones, has AMAZING low light capability, higher megapixels, and is a full frame camera!
b.) Still need a few more things for my studio! First, a wireless trigger so that I don't have to keep my camera plugged into my lights with a huge long cord, second a remote so that I can be away from my camera and still take photos. Third, I need an actual reflector. Alas, insulation hasn't been doing that swell of a job : (
4.) Once I find a name, I'll be throwing money forward to getting a professional logo and website design. Then business cards and maybe a business license thing. YEAH!
I'm on my wayyyyyy.
5.) When people buy CDs from me, now they're going to get them in super sweet custom CD cases! I'm excited about that.
BUT DANNGGG I NEEEDDD A NAMEEE!!!

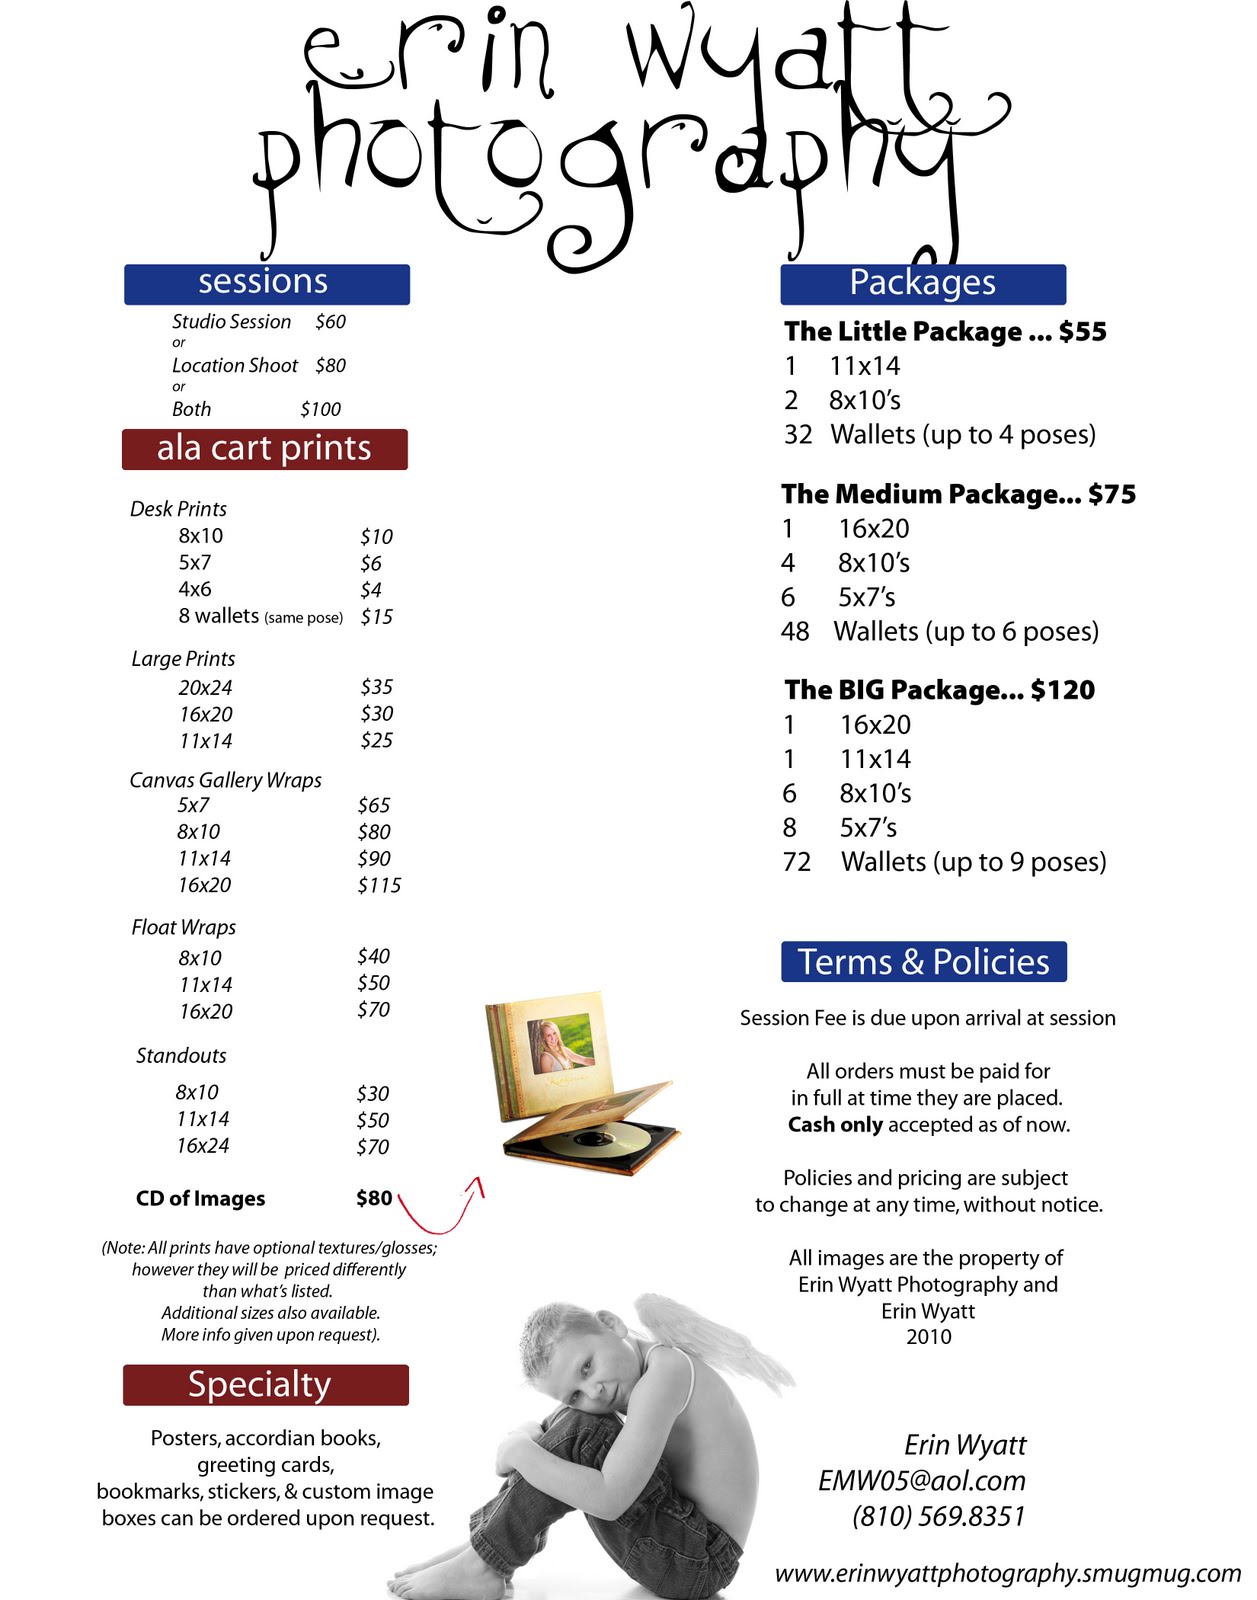
Here's my price list, and I decided to make a quick products page!

Thursday, June 10, 2010

Day 17 part 2!!


Got to shoot a cutie tonight--Maddie R!

Here she is, over a month old.

If you saw my previous post, the blankets used in these two photos are the new ones I got!! The top photo is with the furry rug, and the bottom is the blanket I got from Big Lots (WHICH, I love because on the right side of Maddie you can see all the texture in the blanket and it looks cool!)

Day 17---PROPS

Tuesday night I traveled down to Ikea and spent some money on photography props!! Here is a real quick photo of what I bought!

On the left you'll see a whicker basket, it's standing upright and is very shallow and egg shaped. Less than ten bucks. The pink chair was about 15 dollars, and then I got the two stools--one green, one white---that were about $9 each. The rug on the floor is from Ikea and cost 25 whopping bucks, but is totally worth it!!
The blanket on the couch I bought today at Big Lots for $15, it's hairy and has cool swirl patterns. I have a shoot tonight and am hoping to use all but the chairs!


Wednesday, May 26, 2010

Day 16

Along with my Nikon d80, I have 4 lenses that I use. I have a 18-55 which I use most of the time when not doing actual photography, a 55-200mm, a f/2.8 fisheye that cost a pretttyyyy penny, and my absolute favorite, my portrait lens---the cheapest but most worthwhile purchase: Nikkor f/1.8 50mm.

This lens is pretty boss because:
1.) It's tiny!! it's half the size of my 18-55 and easy to cram into my camera bag.
2.) It can be your best friend or your worst enemy. Depending on what your aperture is at, this lens can make your picture sharp as all get out. Or, if at it's biggest aperture, really gives you depth of field.
3.) It was reallly cheap. $100-150? I think. It was in my budget at the time, that's all I know!
4.) I can be doing really bad portraits with my 18-55 and will put this baby on and BAM! suddenly i'm working magic, like in the engagement photo shown below!! Suddenly everything clicks and poses come together, and lighting and oh man. I love this lens!!


That's todays lesson! Invest in one good portrait lens :)

Thursday, May 20, 2010

Somers photoshoot

Just some photos from my latest family shoot!!

New Soft Box

I am super stoked. I by chance found a Calumet flyer booklet in the bushes by my house that probably fell out of our mail at some point, and advertised in it was 1/2 off soft boxes! and of course I had to have one!! : ) I wish I could say 'long story short' but all I did was buy it yesterday and it got here today! Once again I'm super stoked.
So I set it up and took one quick photo of myself with it (unedited other than to change to b/w) and can't wait to use it some more!! I have an engagement shoot this weekend, I'll post photos!

Monday, April 12, 2010

Day 15

Here's some editing....
First one: On the left is the unedited photo, on the right is the finished product. I use the dodge tool to lighten the background because I wasn't concerned with lighting it when I was taking the pictures. Added contrast and edited with Portraiture via Photoshop.

Even though in real life Mary is super skinny, I wanted to better show it in this photo. This first photo, below, is the unedited. The one below you can see that I used LIQUIFY in photoshop and reduced her arm a bit, along with her stomach and back. I took away neck lines underneath her chin along with some other areas. The b/w photo is a little blown out so you can't really tell in some areas the work I did.
zzzzzzz....


Sunday, April 11, 2010

Day 14


I did a photo shoot out of the blue of my friend Mary tonight and it was loaddssss of fun!! She just left like half an hour ago, and I have to work in 7 hours so I'm not going to go into detail right now, but I quickly edited some photos to put up for yahs! enjoy!


Saturday, April 10, 2010

Day 13

BLAST FROM THE PAST!!!

Over a year ago, I had a photojournalism class and our end project was doing a photo story on someone. I did mine on Dave Butcher, Emily Butcher's dad and a member of my church.
This is what I had to print out super big and turn in : ) (Basically a photo story is a group of photos that tell a story. Dave Butcher is a father, a farmer, a janitor. I captured all those aspects to tell about him thru the images)
Page 1

page 2
You can click on the images to see them bigger!!


Friday, April 9, 2010

Day 12

Thought I'd show you a before an after. Edited the photo in photoshop, using Portraiture and a black and white action.
Before:
After:
this was a complete accident, which is how most of my better photos turn out. I was trying to fill in the paper background around them where you see ceramic wall and I zoomed in to see better, and I liked the cropping. So I immediately stopped what I was doing and cropped it as it was. Then gave up on the paper idea and filled it in with the black paintbrush. I cheat

Thursday, April 8, 2010

Day 11

Started experimenting with adding texture to photos...here's my first try:
One way you can accomplish this:
0.) Edit the picture how you want it. You can do this at the end of the whole process, but I like to do it before.
1.) Search on Google for free photoshop textures. pick a few, download them, save them to your computer.
2.) Open your photo in photoshop
3.) Open your chosen texture file in photoshop. Be mindful of the colors in your photo and that of your texture, because they'll mesh and get ugly.
4.) Drag your texture on top of your photo. It may show up really small, so you'll have to enlarge it for it to cover the whole photograph.

5.) It should then look like this
6.) But now you can't see your photo beneath the texture. So go to your layers menu, click on the drop down menu (should by default say Normal) and you can choose from either Overlay or Soft light. Overlay is a little harsh for me, so I went with the latter.
7.) Now it should look like this.
8.) I didin't want the texture to be so obvious, so I went back to my layers menu and altered the opacity. Slide it around till you get a look you like.
9.) I did somewhere around 35%. This is what it looks like:
10.) You then need to create a layer mask. In your layer menu, at the very bottom, click on the square with a circle in it. Your Layer 1 will then look like this:
11.) Making sure the white box is selected in your Layer 1 (see above photo), choose your black paintbrush
12.) Next, paint over the parts of the picture that you don't want to be textured. The black paintbrush will essentially erase that layer. I painted over the baby and left everything as is. Here's starting over his face.
13.) Finished photo. Your Layer Mask box in Layer 1 should look like as seen below (should have the outline of what you colored over)

And now you're done!!
You can add multiple layers of textures, which is what I did in my final photo (seen at top) and just mess around.

Later!