Wednesday, May 26, 2010

Day 16

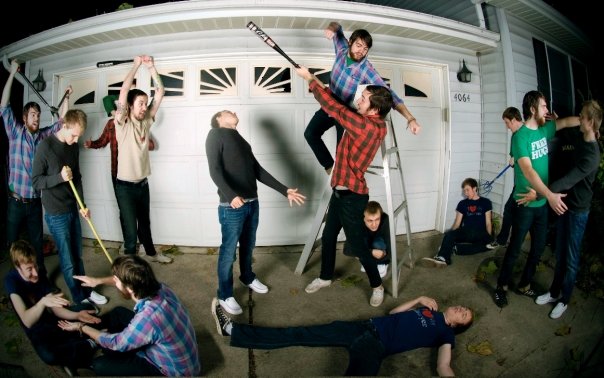
Along with my Nikon d80, I have 4 lenses that I use. I have a 18-55 which I use most of the time when not doing actual photography, a 55-200mm, a f/2.8 fisheye that cost a pretttyyyy penny, and my absolute favorite, my portrait lens---the cheapest but most worthwhile purchase: Nikkor f/1.8 50mm.

This lens is pretty boss because:
1.) It's tiny!! it's half the size of my 18-55 and easy to cram into my camera bag.
2.) It can be your best friend or your worst enemy. Depending on what your aperture is at, this lens can make your picture sharp as all get out. Or, if at it's biggest aperture, really gives you depth of field.
3.) It was reallly cheap. $100-150? I think. It was in my budget at the time, that's all I know!
4.) I can be doing really bad portraits with my 18-55 and will put this baby on and BAM! suddenly i'm working magic, like in the engagement photo shown below!! Suddenly everything clicks and poses come together, and lighting and oh man. I love this lens!!


That's todays lesson! Invest in one good portrait lens :)

Thursday, May 20, 2010

Somers photoshoot

Just some photos from my latest family shoot!!

New Soft Box

I am super stoked. I by chance found a Calumet flyer booklet in the bushes by my house that probably fell out of our mail at some point, and advertised in it was 1/2 off soft boxes! and of course I had to have one!! : ) I wish I could say 'long story short' but all I did was buy it yesterday and it got here today! Once again I'm super stoked.
So I set it up and took one quick photo of myself with it (unedited other than to change to b/w) and can't wait to use it some more!! I have an engagement shoot this weekend, I'll post photos!

Monday, April 12, 2010

Day 15

Here's some editing....
First one: On the left is the unedited photo, on the right is the finished product. I use the dodge tool to lighten the background because I wasn't concerned with lighting it when I was taking the pictures. Added contrast and edited with Portraiture via Photoshop.

Even though in real life Mary is super skinny, I wanted to better show it in this photo. This first photo, below, is the unedited. The one below you can see that I used LIQUIFY in photoshop and reduced her arm a bit, along with her stomach and back. I took away neck lines underneath her chin along with some other areas. The b/w photo is a little blown out so you can't really tell in some areas the work I did.
zzzzzzz....


Sunday, April 11, 2010

Day 14


I did a photo shoot out of the blue of my friend Mary tonight and it was loaddssss of fun!! She just left like half an hour ago, and I have to work in 7 hours so I'm not going to go into detail right now, but I quickly edited some photos to put up for yahs! enjoy!


Saturday, April 10, 2010

Day 13

BLAST FROM THE PAST!!!

Over a year ago, I had a photojournalism class and our end project was doing a photo story on someone. I did mine on Dave Butcher, Emily Butcher's dad and a member of my church.
This is what I had to print out super big and turn in : ) (Basically a photo story is a group of photos that tell a story. Dave Butcher is a father, a farmer, a janitor. I captured all those aspects to tell about him thru the images)
Page 1

page 2
You can click on the images to see them bigger!!


Friday, April 9, 2010

Day 12

Thought I'd show you a before an after. Edited the photo in photoshop, using Portraiture and a black and white action.
Before:
After:
this was a complete accident, which is how most of my better photos turn out. I was trying to fill in the paper background around them where you see ceramic wall and I zoomed in to see better, and I liked the cropping. So I immediately stopped what I was doing and cropped it as it was. Then gave up on the paper idea and filled it in with the black paintbrush. I cheat

Thursday, April 8, 2010

Day 11

Started experimenting with adding texture to photos...here's my first try:
One way you can accomplish this:
0.) Edit the picture how you want it. You can do this at the end of the whole process, but I like to do it before.
1.) Search on Google for free photoshop textures. pick a few, download them, save them to your computer.
2.) Open your photo in photoshop
3.) Open your chosen texture file in photoshop. Be mindful of the colors in your photo and that of your texture, because they'll mesh and get ugly.
4.) Drag your texture on top of your photo. It may show up really small, so you'll have to enlarge it for it to cover the whole photograph.

5.) It should then look like this
6.) But now you can't see your photo beneath the texture. So go to your layers menu, click on the drop down menu (should by default say Normal) and you can choose from either Overlay or Soft light. Overlay is a little harsh for me, so I went with the latter.
7.) Now it should look like this.
8.) I didin't want the texture to be so obvious, so I went back to my layers menu and altered the opacity. Slide it around till you get a look you like.
9.) I did somewhere around 35%. This is what it looks like:
10.) You then need to create a layer mask. In your layer menu, at the very bottom, click on the square with a circle in it. Your Layer 1 will then look like this:
11.) Making sure the white box is selected in your Layer 1 (see above photo), choose your black paintbrush
12.) Next, paint over the parts of the picture that you don't want to be textured. The black paintbrush will essentially erase that layer. I painted over the baby and left everything as is. Here's starting over his face.
13.) Finished photo. Your Layer Mask box in Layer 1 should look like as seen below (should have the outline of what you colored over)

And now you're done!!
You can add multiple layers of textures, which is what I did in my final photo (seen at top) and just mess around.

Later!

Wednesday, April 7, 2010

day 10


Flint-ALL2
Originally uploaded by erinmwyatt05
thanks to all my helpers : )
these are my friends who came all the way over to my house so that I could take their pics : ) very glad.

Wednesday, March 31, 2010

on hiatus

for awhile. traveling to north carolina.
here's some recent tho, from anther fLint shoot and some left out from previous posts

and here's another one of my niece
and another of Jacob!


Tuesday, March 30, 2010

Day 9

Nothing new to post today. I was going to do some light writing but by the time I decided that's what I wanted to do, I couldn't let myself do it with just a boring old flashlight. I wanna get some glow sticks, some gels for the lights to give them color. I want to go all out. And probably run(lol) across the entire golf course in my backyard and do some huge project. so for now, here's my first venture into light writing a few years ago:
I found this guy on Flickr that's giving me a TON of ideas. If anyone wants to help, let me know! It could be prettttyyy cool.
Check him out, though!

Light Writing: Typically pretty easy, however, it's one of those things you definitely need to think out before hand, especially if you've never done it before. A lot of things can go wrong:
1.) While you're 'writing' your light source may at times turn away from the camera and will not get captured, so in the final photo your drawing has gaps
2.) Incorrect exposure. You need to use a really long shutter speed to do these--if your point and shoot camera has an M setting (Manual) or S (shutter speed/priority) then you have to use one of those. I mostly do these by myself so I usually put my shutter speed to 30 seconds to give plenty of time.
3.) Blur---use a freaking tripod!! Since it's a long exposure your camera has to stay still!
4.) Over exposure: The longer your shutter is open, the more light comes into your camera. If the room you're in isn't fully dark and you put your shutter to half a minute, then your picture is going to come out super bright and you won't see the light writing. At times like these you have to compensate---if you can change your ISO put it on the smallest number possible (100?). If you're shooting under Manual, bump up your Aperture to a bigger number (16, or 22) (changing both ISO/Aperture will guarantee a darker photo). As you practice you can adjust these as need be.
5.) Unfocused. You may think it doesn't matter if streaks of light are in focus, but personally I think it does. And being in a dark place doesn't really help your camera in finding something to focus on. Try putting your camera on self timer, turn the lights on in the room, go to your chosen spot and then press the shutter button on your camera or have someone do it for you. The self timer will blink and you'll have plenty of time to run and turn the lights off and go back to your exact spot before the camera opens the shutter.


You'll notice in your photos that you may show up as a big blur in them. The light you're using will often spill back onto you, illuminating your hand/arm/whatever while you're taking the exposure. You can fix this by cutting a hole in the middle of a paper plate (the size of the flashlight handle if that's what you're using) and then paint the front of the plate black, so that when the light bounces back onto the plate you wont see this giant white thing.
If you're taking the photo of someone light writing, you can do a few things to put them IN the photo.
1.) You can choose to do this at the beginning/end of the exposure, it's up to you, but you can (if your camera has the option) put your flash on REAR. This means when the exposure is done, your camera will flash and can capture your friend standing beside their work.
2.) Flick the lights on for a few seconds during the exposure. You'll have to experiment, but it works.
3.) 'Paint' over your friend with another flashlight from behind the camera. Again, it takes experimenting to see how much light you'll want and what's too much, but it will be worth it.

Hope this helps!!

Oh, my bad--if there are two of you making this photo (one behind the camera, one drawing) then it's often better to set your camera to BULB (B). If it has the setting. Mine, I have to put the dial to M for Manual, then I have go backwards thru all the shutter speeds (2 seconds, 16 seconds, 30 seconds, 1 minute, etc) until the last thing it comes to, which is Bulb. This means you have to keep your finger on the shutter button holding it down for however long you want your exposure to be. That way you don't have to wait the extra time if you finish early on say, a 30 second exposure. Hope this makes sense.

Erin.


Monday, March 29, 2010

Day 8


Jacob01
Originally uploaded by erinmwyatt05
Meet Jacob!

This morning I got to take pictures of the cutest little boy from church. He was perfectly tempered and super smiley.
Set up was normal. Strobe light camera right pointed at Jacob, another camera left hitting just the background. reflector right in front of him and then one right to his left.
Camera settings: 100ISO, f9, 1/160.

Sunday, March 28, 2010

Day 7

For over a year now, I've been interning at Little Monsters Photography in Flushing, Mi (about 30 minutes from my house). Kari Coon, who is the photographer, is pretty awesome!! : ) She helps me out a ton---she's bought me smoothies, given me rolls of background paper, lent me her dog for a few hours, let me use her studio a few times to take pictures of Drew & Kailyn, and now--for this entry--lent me her son(in her studio) to photograph for a school assignment!! (Thanks, Kyle!!)


This is a picture of the set up. 1 softbox shooting into a reflector.
Camera settings: ISO100, f8, 1/160.

Final result (kinda breaking my photo-a-day rule:

and

and


I got a lot of good photos, the rest will probably be somewhere on my photography website (www.erinwyattphotography.smugmug.com)

one week in the blog world, down : )

and check out:
www.littlemonstersphotography.com

Saturday, March 27, 2010

Day 6


This is my niece Hannah. She's super cute. I took this today, it wasn't a very good shoot. Exhaustion hit and she had bad gas pains. Somehow when I want to do good, I don't.

One strobe light, camera right.

What I would have changed: blanket is pretty long, I would have tried to hide it a bit better. I may go back over it and crop some...let's call it a rough draft


Since this entry sucks, here are some tips for getting kids to look towards the camera/smile.
1.) This toy, which can be bought at Target for less than 10 bucks, has been the main thing I use when trying to get kids attention while interning. It bends, it makes weird noises (like giggles I think), rattles, and part of it lights up. I stand behind the photographer and shake it a lot.

2.) Apparently at a lot of photography expos they sell these: This isn't the one I bought, but it's similar. The fan lights up and does different colors and changes patterns and stuff. Kids can't help but stare at it, and it's safe enough that they themselves can play with it without getting hurt (somehow). I got mine at Spencer gifts for about 8-9 bucks.

Friday, March 26, 2010

day 5-EPIC FAIL

So I have 2 minutes to get this entry done for it to be actually on day five.
But...I was super busy today and didn't have time to go try out a technique. So here's one I did try earlier in the week and failed at. I was trying to do this tricky perspective thing, where one object was closer to the camera and the other was farther away but I make it look like they are right in front of each other and one is huge and the other tiny. I don't know. Once again it's late and I don't want to explain anything. But I tried it. I didn't have any people handy so I pulled out my trusty action figures: Goku, a Masters of the Universe dude, a dinosaur, and Jane Eyre. that's right. I was going to do Goku vs. dinosaur and Jane Eyre vs. MOTU, but I couldn't get it to work, things were out of focus and I wasn't really into it (this is when I gave up and started shooting pictures of myself for that collage on day 3)
so in a fit of anger I deleted all my attempts at trick perspective and just took a regular old picture of my subjects. so that's all you get to stare at.
OUT!
(and J.E. is actually holding a quill. her weapon of choice)

Thursday, March 25, 2010

Day 4


I really love GLEE on Fox. So in honor...


Just a basic setup. Strobe shooting across the photo into a reflector. one strobe on the background. Edited faces with Portraiture.

and....there are more photos on my Flickr page...(see left side of screen)

Wednesday, March 24, 2010

Day 3


I've done these kind of photos before (see below) so I'm kind of cheating here, & only on day 3, but I was originally trying to do some tricky perspective crap and my camera wasn't having it so it was a no go. Anyways, I love doing these, so at 11:30 last night I started shooting. I didn't mess with my lighting or test it or anything, but I shot at maybe....1/200, f16. Maybe. It's 2am and I'm really too tired to look it up.
(I learned a bit about this process at school, when I had a lame-o teacher who didn't even bother to teach me about layer masks, just had us use the History Brush.)

First, took the photos---each photo I was in it once (unlike my previous entry).
Put my camera on a tripod, 10 second self timer, then I just randomly went somewhere and stood. I don't think these things out beforehand, I just do whatever. Luck? Anyways, just did different poses, making sure that I wasn't overlapping myself with a previous picture (in a bad way).
Once I got in photoshop, I took the picture with the person farthest away from the camera and opened it as well as another picture with someone about equal distance away (i.e. the Erin's holding gray cards). I drag one photo and put it over the other, making sure that they are correctly lined up. I adjust the opacity on the top picture (picture B, to about 60%) so that I can see both B and the bottom picture (A) overlapping. Then, I select my History brush and drag it over the Erin in picture A. When I put my opacity back to 100%, picture A will disappear and all I'll see is picture B and the extra Erin (history brush brings forward your selection into the top layer, or B in this instance). I save the photo as a .jpg and then close all the windows out. I then open the photo I had just saved, as well as another new Erin, and do the same process over and over and over, bringing in new Erins, the last being those closes to the camera. I knowwwww there's easier ways, but this is mine.
Totally confused you?? It's hard to describe unless I provided screen shots.
that's it...

Here's a few other photos that I've done using this process...
HAWK AND SON PHOTOSHOOT
ASSIGNMENT FOR PHOTOSHOP CLASS

Tuesday, March 23, 2010

Day 2


Let's see. At the last minute I decided to try this....I've attempted it before but never got the exposure how I wanted it. So here it is....2 travelite strobes--1 camera right shooting across the photo, 1 camera left, shooting at the subject. I put the camera on a tripod, set the shutter speed to 10 seconds and the aperture at f16. (100ISO). I turned off all the lights in the room and the model lights on the strobes, hit the camera's shutter button, and triggered the strobes by hand (using the test button) at 2 second intervals. ta-daaa.
bonus photo: a bigger view: